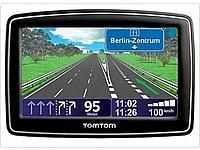
TomTom XXL IQ Routes edition Europe
In order to update your GPS device: TomTom XXL IQ Routes edition Europe with the latest update, follow next instructions.
First of all, be sure you got the update file for your TomTom XXL IQ Routes edition Europe device, downloaded from SpeedcamUpdates.com.
If still haven't got it, you can get it now filling the form you see on this page.
- Extract files from the SpeedcamUpdates zip package. If the file you have downloaded is not a ZIP file means the file is already decompressed, and you can continue with the next step of this installation instructions.
Method 1.
- This method is valid if you're able to connect your TomTom XXL IQ Routes edition Europe device to your PC Computer and get access to the main shared folder of the device.
- Plug your TomTom XXL IQ Routes edition Europe device to your computer thru USB cable. If everything goes well you should see a new drive that you can explore using Windows Explorer or Finder if you use Mac.
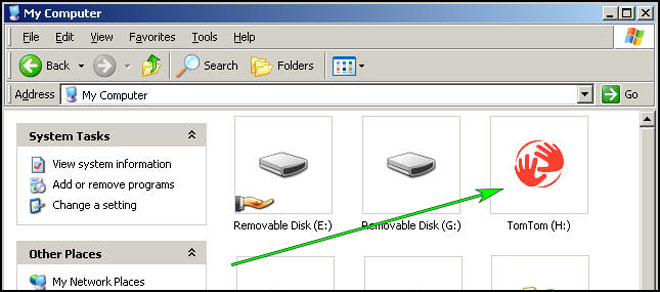
- Using the file explorer look for the folder with a region or country name, like Western Europe, Spain, Italy, United Kingdom.

- Copy the extracted files from SpeedcamUpdates, OV2 and BMP, into the map folder you identified in the step before.
- You can enable alerts, and set warning audio when approaching to the speed cameras, in the Enable Alerts section.
- Sign in to your TomTom XXL IQ Routes edition Europe account
- Register your TomTom XXL IQ Routes edition Europe device or select it if it is already registered.

- You're ready now to choose Method 2 or Method 3 for speed cameras installation.
Method 2.
- Using Route Planner
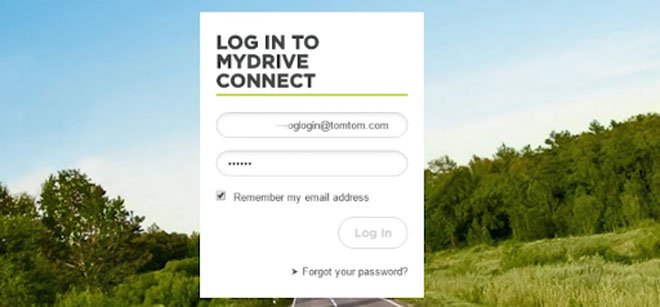
- Go to website: MyDrive
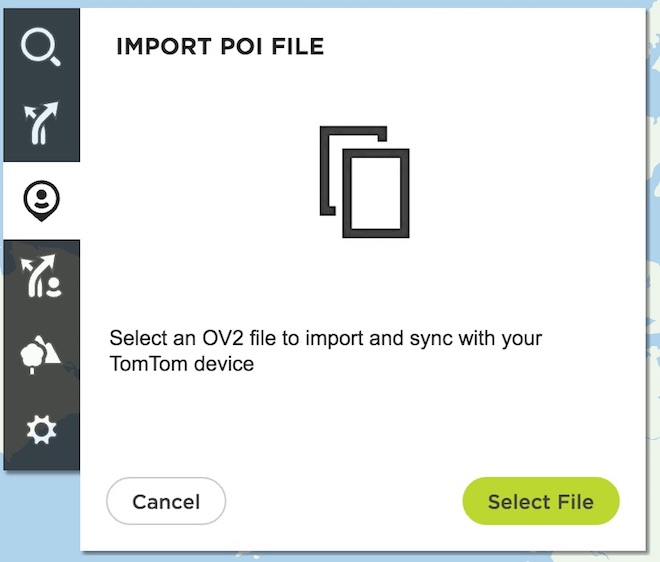
- Do login and click Route Planner => My Places =>POI Files => Import POI file
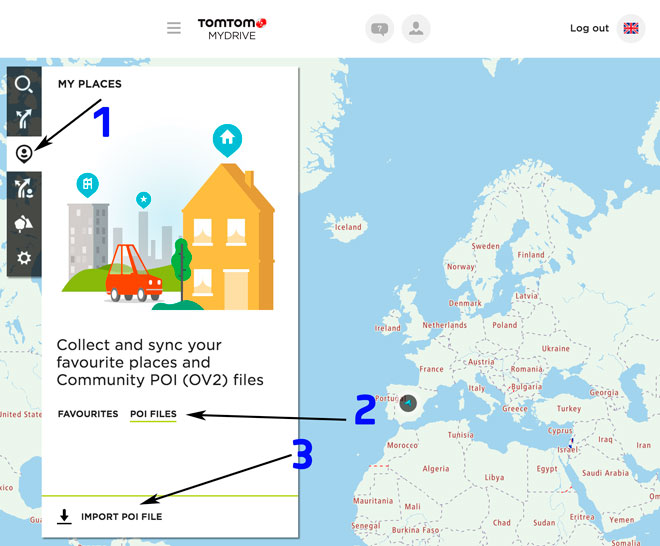
- Select each OV2 file you've downloaded from SpeedcamUpdates and press Import button.
- Files will be automatically transfered to your TomTom XXL IQ Routes edition Europe device.
- You can enable alerts, and set warning audio when approaching to the speed cameras, in the Enable Alerts section.
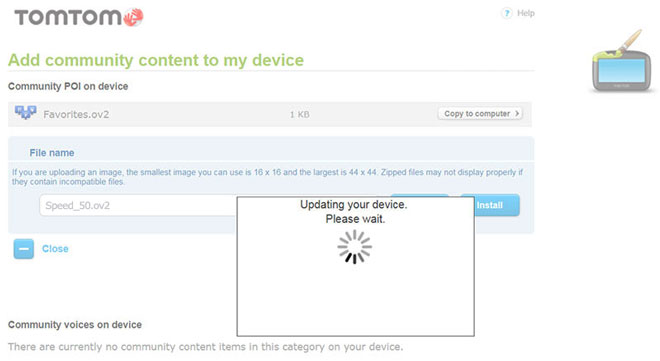
Method 3.
- Using Add Community content with MyDrive
- Right click in MyDrive Connect icon in the system tray and select Manage community content
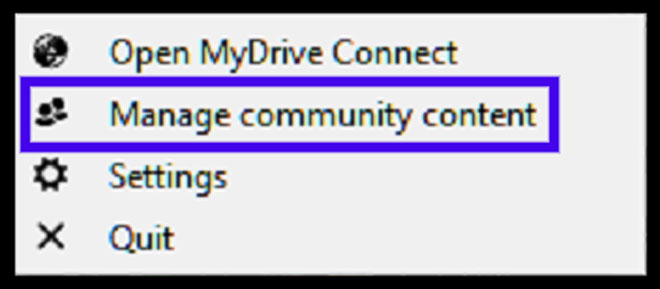
- You have to add each OV2 file downloaded from SpeedcamUpdates by pressing Add Poi button. Remember to add the associated bmp too which is included in the downloaded files.
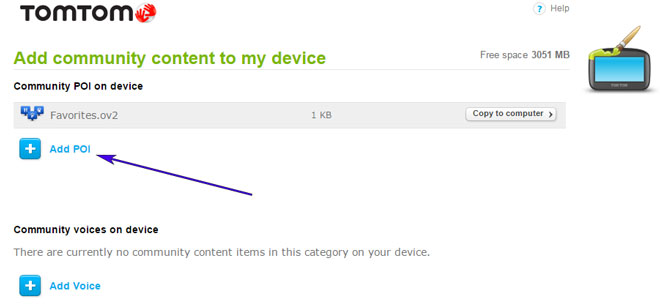
- When you finish press Install to transfer all information to your device.
- Enable Alerts
In order to enable alertes go to Main > Settings > POI settings > Warn when approaching a POI
Search the categories where speedcams are located
Select distance and warning sound per each category
A speaker icon will be shown close to the category name.
There are 3 different methods to install speed cameras in your TomTom device, depending on the capabilities and release date.
In order to use Method 2 or Method 3 you have to install TomTom Software. Follow next instructions to do it.
Download and install software MyDrive from TomTom.
You need a registered TomTom account.
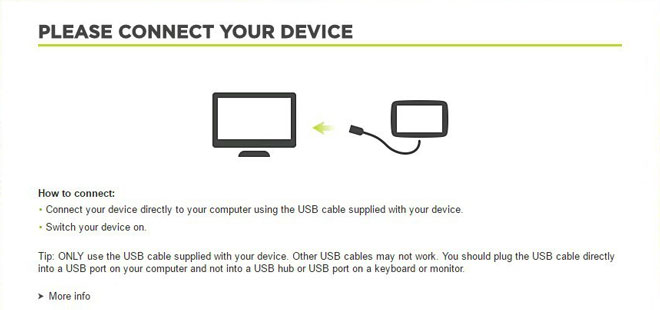
Connect your TomTom device to your computer and run "MyDrive Connect" software.
Remember you can customize freely your download. Get access to the customer control panel and using the customization tool in order to get a customized speedcam database according to your needs. You will need this tool if your device doesn't accept the size of the new update. You can add and remove countries speedcam data to your current setup.
XXL IQ Routes edition Europe Speed Camera Update Information
The TomTom XXL IQ Routes Edition Europe provides comprehensive map coverage across 42 European countries. This extensive mapping ensures that users can navigate through various regions with confidence. Regular map updates are essential for maintaining accurate navigation, as they include the latest road changes, new routes, and points of interest. Keeping your device updated with the latest maps enhances the overall navigation experience, allowing for efficient route planning and minimizing the chances of encountering outdated information during your travels.
Updating the TomTom XXL IQ Routes Edition is straightforward. Users can connect the device to a computer via USB or use an SD card for updates. First, ensure that the TomTom Home software is installed on your computer. Once connected, the software will prompt you to download the latest map updates. Follow the on-screen instructions to complete the installation. Regular updates are crucial for optimal performance, ensuring that your navigation device reflects the most current road information and routes.
The TomTom XXL IQ Routes Edition offers precise route guidance, helping users navigate efficiently. The device utilizes the IQ Routes technology to calculate the best routes based on real-time traffic data and historical speed information. Additionally, it provides alerts for speed cameras, enhancing driver awareness and safety. By integrating these features, the GPS ensures that users can make informed decisions while driving, leading to a smoother and more reliable navigation experience across Europe.
Looking for additional GPS update information and compatible navigation systems?
GPS Update & Installation Guide